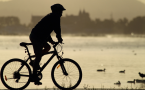
The Top 5 Need-To-Know Bicycle Repair Tips
Whether you’re an avid cyclist, weekend roller or a daily commuter, you’ll need to do a few bike repairs or maintenance tasks sooner or later. When an unexpected repair is required while you’re out and about, find out if there is a Pit Stop cycling vending machine nearby (check our locations here). Our vending machines are stocked with repair essentials to get you back on the road again quickly.
If you’re new to cycling, you might need some help making repairs and performing tune-ups. Don’t worry, we’ve got you Sorted! We’ve scoured the web and incorporated some of our own advice to bring you the best easy to follow tips and tricks for when you most need them.
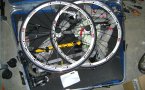
Fixing a flat
How to patch a hole: watch video here
How to replace an inner tube: watch video here
It’s Murphy’s law that as soon as you need to get somewhere quickly, it starts to rain and you get a flat tyre. Just stop by one of our Pit Stop vending machines a puncture repair kit or new inner tube (and you can pick up a rain poncho while you’re at it!). But how do you choose between whether to patch or replace an inner tube? And how do you do both?
First remove the wheel and tube from the tyre and try to find the cause of the flat. A small hole can be patched easily, as shown by Brendon Nicholas in his Howcast video series. The tools you’ll need are a patch kit, tyre lever and a pump.
Brendon also explains that there are different kinds of punctures that are caused by certain things – in a video about dealing with a flat tyre he explains the causes of some punctures and shows how to avoid them.
If you need to replace the inner tube, Lance Armstrong has a great example on YouTube, complete with amusing introduction.

Getting the best from your brakes
How to fix/adjust brake pads, cable length, brake arms: watch video here
How to fix brakes: read article here
No doubt your bike’s brakes have saved you from harm more times than you can remember. We’re all very grateful for the invention that allowed us to control our speed and whether or not we plough into the car that just cut in front of us.
For them to keep looking after us, we must take care of our brakes. We’ve found an informative video by Roadside Cycles that explains how to change brake pads, adjust cable length, set up brake pads and adjust brake arms.
For pictures and simple instructions, look no further than wikiHow’s article on fixing the brakes on your bike.
You’ll need a screwdriver or Allan key to make your different adjustments, plus oil to lubricate cables. Light machine oil or a purpose-built oil is recommended.
Gear grinders
How to adjust bike gears: watch video here
How to fix a poorly shifting bike: watch video here
Just like those brakes, having gears on a bike make it much easier and more efficient to ride. However if your gears are grinding or not shifting properly there are a number of things that can cause these problems.
Bike Boo Boos has a great article about shifting adjustment; compete with diagrams and handy hints.
Of course the trusty YouTube has a plethora of instructional videos of which we’ve waded through and brought you two of the best – Learn How To Adjust Bike Gears with Sheldon Bole, plus How To Fix a Poorly Shifting Bicycle by Expert Village.
All about: shifting adjustment

Crippled chains
How to fix a broken chain: read article here
The chain on your bike is the driving force from your legs to the wheels. Without it you’d have to resort to the Flintstone method of bike riding – not as attractive or as practical as the recommended style! Regular maintenance of your chain such as regular oiling will ensure a long life.
Breaking a chain is not as common as it once was, but is still an inconvenience when it does happen. PinBike has a fantastic tutorial on fixing a broken chain, along with pictures, tips and a video.
Love lockdown
How to lock up your bike: read article here
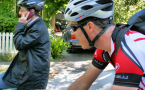
Unfortunately bicycle theft is a problem in Melbourne and across Australia, so it’s important to know the safest places and ways to park and lock your pride and joy.
Invest in a strong, sturdy d-lock or chain (or both) and secure your bike in a well-lit area where there are other bikes and people around. Take up as much room in the d-lock as possible; this reduces space and leverage for would-be thieves to attack.
For diagrams and descriptions on the best methods of locking, Kryptonite has a step-by-step list and tips for locking.

Make sure you can easily identify your bike if the worst happens. The better description you give, the easier it will be to find. To report a stolen bike, go to the police immediately and visit the Australian Stolen Bike Register.
Did you find these tips helpful? Do you have any of your own? Tell us about them in a comment below.
Picture credits:
Day 5 by Mark Doliner, CC-BY-2.0
Bicycle gears by Gavin Tapp, CC-BY-2.0
002 by Joel, CC-BY-2.0